How to Play Blu-ray DVD and Video Files on Kodi V17
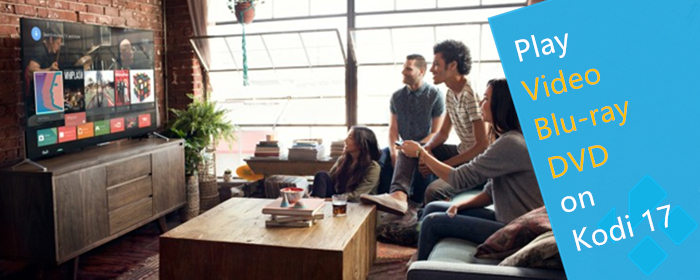
Kodi can stream your multimedia from anywhere in your house or directly form the, help you create a perfect home media center. Kodi 17 (Krypthon) is now available for Windows, macOS, Android and iOS. This artifle show you how to add your Blu-ray, DVD movies and any video file to Kodi 17 media library for wathing on any devices with Kodi 17 installed.
If you have large numbers of Blu-ray and DVD discs, watch Blu-ray and DVD movies on Kodi by adding all of the movies into Kodi library without physical disc and Blu-ray / DVD player would be great.
Considering although Kodi can play many kinds of movies, it has difficulty of streaming encryption Blu-ray and DVD disc for getting stuck. So the above operation have to be devided into two parts:
Part 1, Stick encryption Blu-ray and DVD and convert videos for Kodi
Part 2, Add Blu-ray / DVD and videos to Kodi.
From Official Kodi WiKi, the Kodi support format list as below:
Container formats: AVI, MPEG, WMV, ASF, FLV, MKV/MKA (Matroska), QuickTime, MP4, M4A, AAC, NUT, Ogg, OGM, RealMedia RAM/RM/RV/RA/RMVB, 3gp, VIVO, PVA, NUV, NSV, NSA, FLI, FLC, DVR-MS and WTV
Video formats: MPEG-1, MPEG-2, H.263, MPEG-4 SP and ASP, MPEG-4 AVC (H.264), H.265 (as from Kodi 14) HuffYUV, Indeo, MJPEG, RealVideo, RMVB, Sorenson, WMV, Cinepak.
Part 1. Stick Encryption Blu-ray and DVD and Convert Videos for Kodi
For sticking the encryption of commecial Blu-ray and DVD disc, and convert the video files to Kodi supported format and codec, a Blu-ray Ripping tool, DVD ripping tool and a video converter you need, Here we high recommended Brorsoft Video Converter Ultimate, as an all-in-one Blu-ray Ripper, DVD Ripper and video converter, it enables you to convert, edit video and rip, backup Blu-ray and DVD movies to 250+ formats (including Kodi supported format) with ultra-fast encoding speed, ZERO quality loss! For more features of this all-in-one program, click here.
How to Rip Blu-ray and DVD and Videos to Kodi Supported Format
The trail-before-purchase version availabel for you, the watermark is the only limitation between the trial version and full version. Here in this article, Windows version screenshots were taken as example, the Mac version shares the same steps, just keep in mind you have download the right version, Windows platform .exe files cannot be installed on macOS – and vice versa.


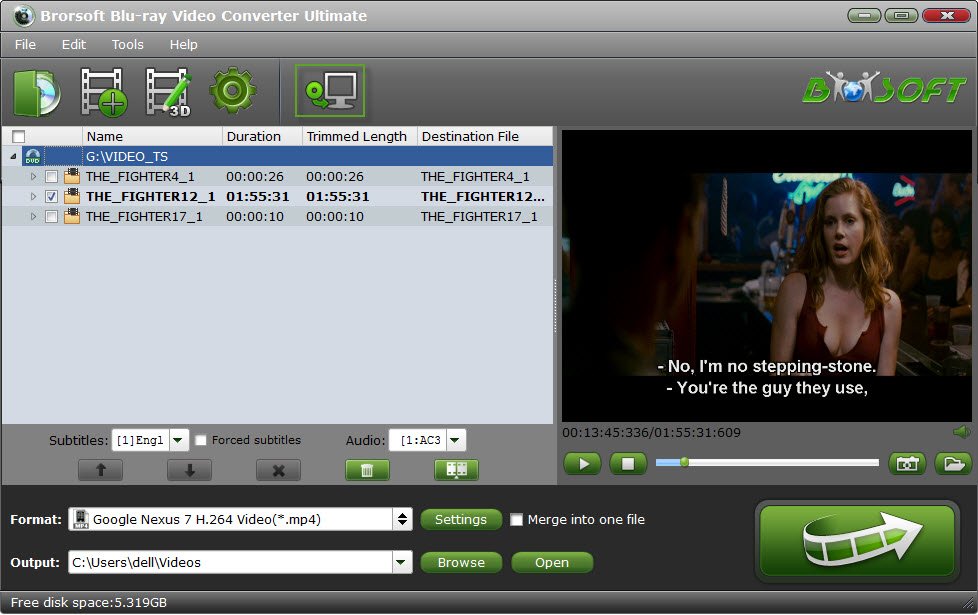
Step 1: Add source files (Blu-ray/DVD/videos)
Load Discs: Insert the Blu-ray disc to the Blu-ray Disc drive or DVD to the DVD-ROM and click the “Load Disc” button to have movies uploaded to the Program. You can also import ISO files, IFO files or Blu-ray/DVD folder for conversion.
Add Videos: Click “Add Files” or “Add From Folder” button to load video or audio files.
Tip:
1. Before loading Blu-ray content, a BD drive is needed
2. Computer should networked so that the Program can access key for cracking the copy-protections of Blu-ray or DVD disc.
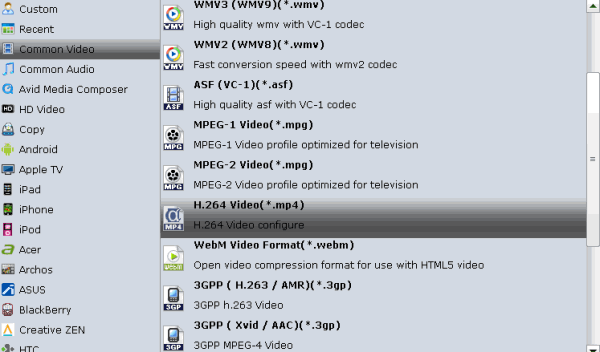
Step 2: Select output format
Click Format (located below where your source files are displayed) and select the format you want from the drop-down list.
For playing on Kodi, you can choose HD MP4 format there.
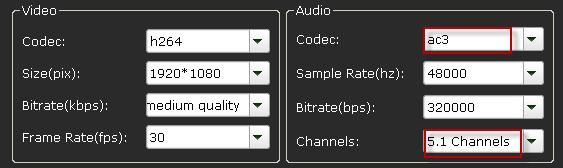
Tips: Adjust video/audio Settings (Optional)
If you want to customize output video quality in further, click Settings button to customize video quality like resolution, frame rate, bit rate, audio channel, etc.
Step 3: Start to convert
After above settings, click the big Convert button to start to convert Blu-ray/DVDs or video/audio files to Kodi supported format.
As soon as the conversion is done, simply click Completed to back to main interface, and click Open button to find generated videos.
Tip: If conversion takes long time, you can set auto shut down by checking the box of Shut down computer after conversion.
Part 2. Add Ripped Blu-ray DVD and Videos to Kodi.
1: Download and install Kodi on your computer. After that, open Kodi.
Note: Here we take Kodi on Android TV as example.
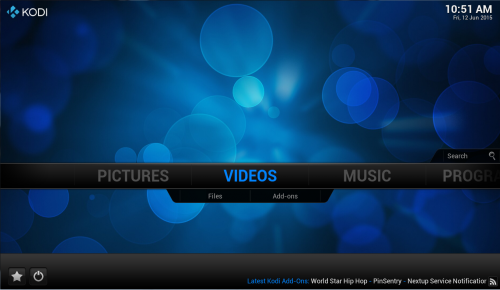
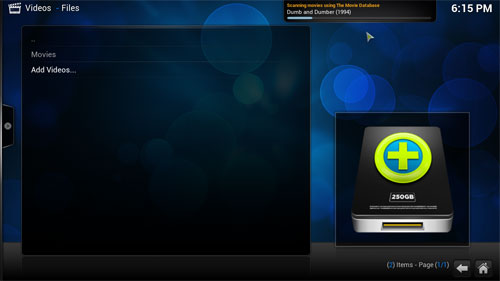
2: Select “Videos” in the home screen menu.
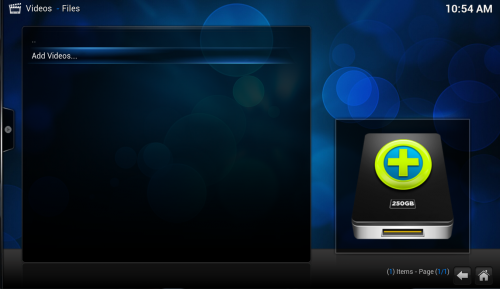
3: Seclect Files, then select “Add Videos”.
4: Click on “Browse” button. From This requester you can select the location where your ripped Blu-ray and DVD movies and converted videos are located on your system. You can also choose a network drive if your ripped Blu-ray and DVD movies and converted videos are there, this tutorial will use the network drive option and we will select “Windows network (SMB)”.
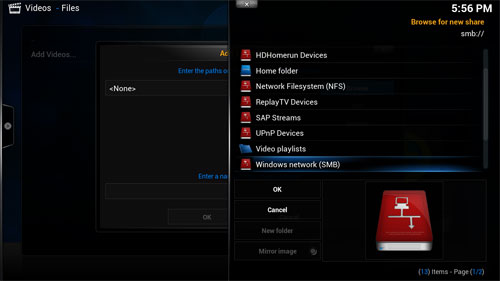
5: In the next screen you should see the directories within your selected directory.
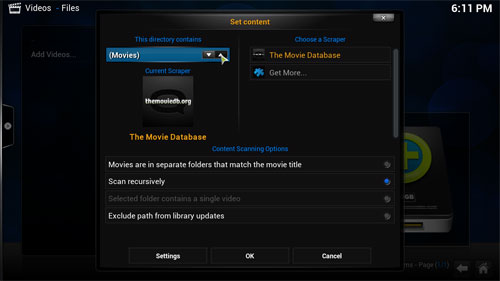
If this is the right directory select “OK”. If all is ok then select “OK” again. In the next screen is where we tell Kodi what our source directory contains, in this case its “(Movies)”. When you are happy with the settings select “OK”.
6: Next screen is refresh info for contents of selected directory, select “Yes”.
When you’ve selected ok you will be presented with this next screen, keep an eye on very top almost to the right as this updates the database with info about the films it finds. This item can take a long time depending on how many Movies you have in your collection.
7: When finished, your ripped Blu-ray and DVD movies and converted videos library should be listed on the interface.
Related Products
Video Converter Ultimate


Useful Tips
- Watch Blu-ray on NVIDIA Shield TV 2017
- Play Blu-ray on Amazon Fire TV
- Stream Blu-ray/DVD to TV with Chromecast
- Watch 4K Blu-ray on Apple TV 4K
- Rip Blu-ray for Plex
- Blu-ray to Roku
- Rip Blu-ray to Kodi
- Play Blu-ray on WD TV Live
- Play Blu-ray DVD and Videos on Kodi 17
- Stream Blu-ray to MiniX Android Box
- Convert Blu-ray to DCP
- Rip BD/DVD to Sony Xperia Projector
Social Connection
Copyright © 2009- Brorsoft Studio. All Rights Reserved.